

Having already highlighted the modular expandability of the Prusa ecosystem in our review of the original Prusa MK4, we are now focusing on what is probably the most exciting add-on for the MK4: the MMU3 kit. This enables multi-material printing with up to five different filaments in a single printing process.
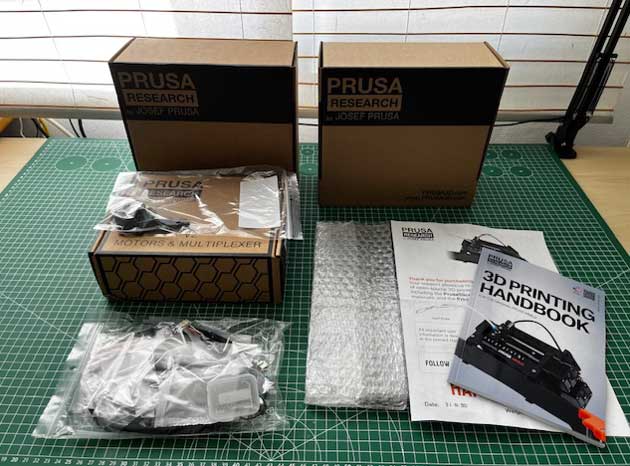
We receive the MMU3 kit in a compact box and first get an overview of the contents. The kit comprises three well-assorted boxes, each filled with a variety of excellently labeled parts bags. At first glance, the quantity of individual parts seems a little intimidating, so we first eat the gummy bears that are also included in the kit to get our blood sugar levels right for the assembly. A well-illustrated manual, which is also included, explains the functionality of the MMU3 (after assembly). The assembly instructions are available online and can be easily found using the QR codes on an enclosed welcome note.
Assembly and commissioning
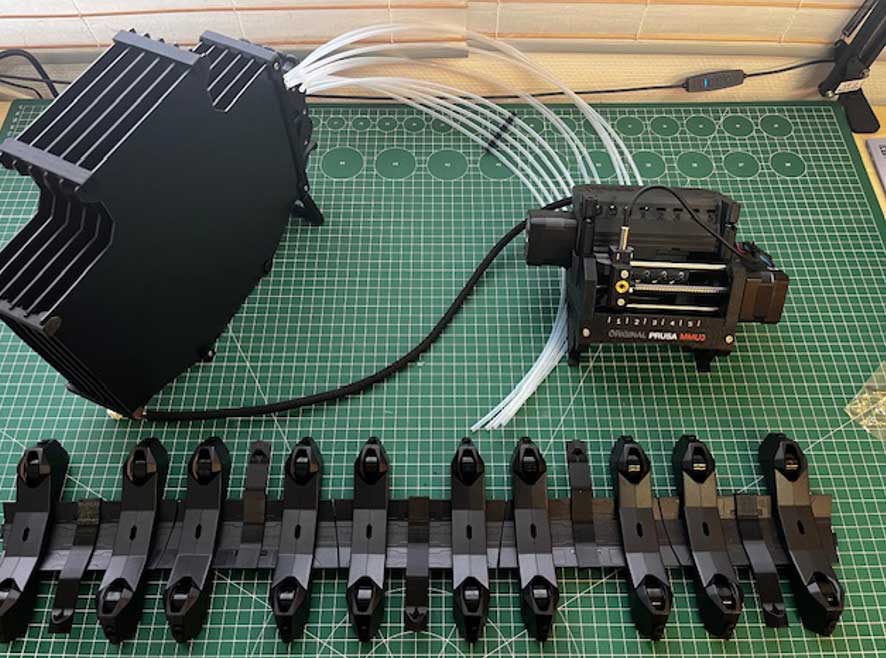
The reason why the assembly instructions are available online becomes clear during assembly: Not only are the instructions continuously improved and optimized editorially, but they are also excellently linked internally to make the optimal instructions for all versions of the Prusa printers and MMUs clearly accessible. Every step, no matter how small, is reliably explained with images and text, and users have the opportunity to post their experiences directly below each step. Our fears of encountering problems during assembly or that one of the hundreds of parts might be missing therefore proved to be unfounded. The excellent labeling, strict quality control and carefully prepared instructions reliably guide you through the process in small, always simple steps that are very easy to master even without prior experience. The only downside is the long assembly time. Even though assembly is much easier and less time-consuming than with the MMU2, you should still plan at least half a day, but preferably a whole day, for assembly and commissioning. However, true makers will enjoy this process, not only because it is an excellent way to familiarize yourself with the structure of the MMU and make the engineering work behind it transparent, but also because it conveys the great advantage of the Prusa ecosystem of being able to lend a hand at any time, print spare parts yourself without outside help or simply retrofit them for future improvements. This approach also promises significant sustainability.
It also illustrates the complex machines for which parts from the 3D printer are suitable. Prusa also relies to a large extent on in-house printed parts for the MMU3. Other parts are laser-cut or, like the spool holder, injection-molded. Excitingly, one part was even additively manufactured using multi-jet fusion.
Connection to the MK4
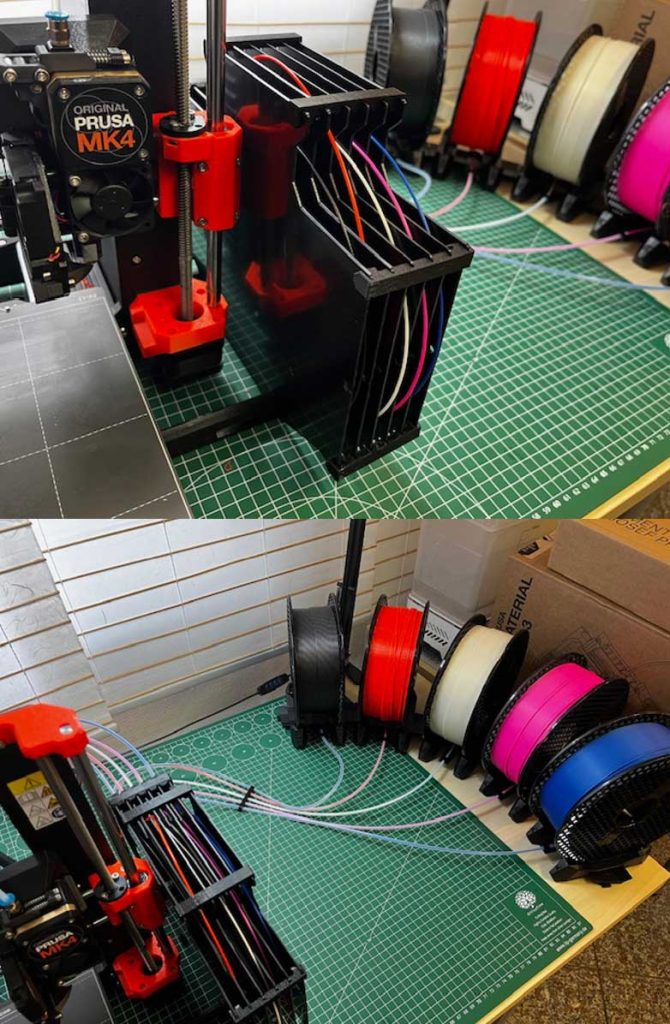
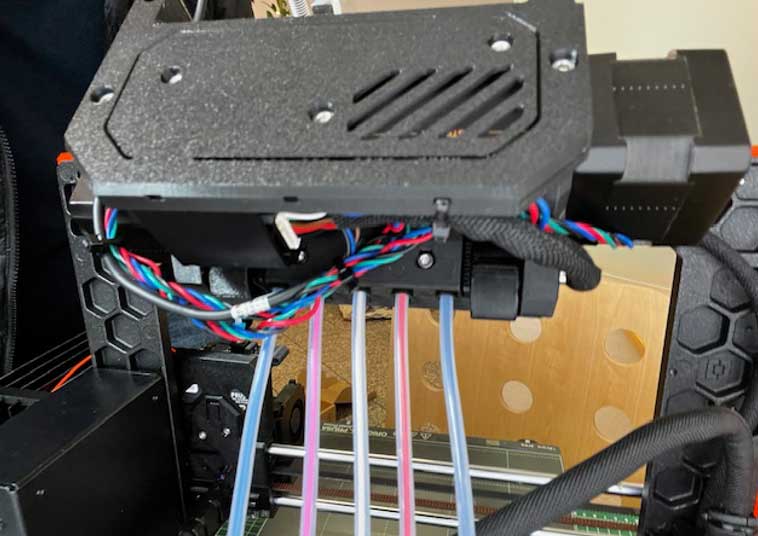
After several days of assembly – for which the gummy bears were unfortunately no longer enough – we are delighted when all the parts are finally ready on the table. The next step is to connect it to the MK4. This requires minor modifications to the extruder and firmware updates for the MK4 and the MMU3. This also goes without a hitch, and the new multi-material setup slowly takes shape on our workbench. What is striking here is the space required by the setup, which is almost too big for our worktable. Interested parties should therefore plan a little more space for MMU3-optimized devices.
Once everything has been connected, the MK4 guides you intuitively through the necessary filament sensor calibrations, which we also completed without any problems.
Filament feed
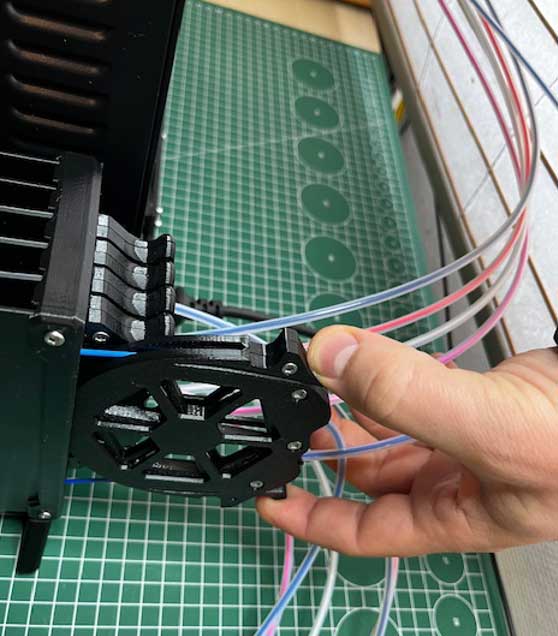
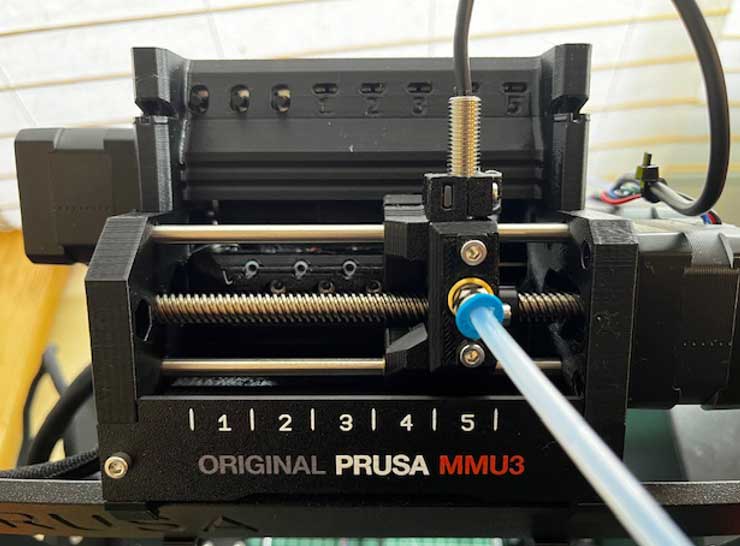
The five filament spools must then be fed in. To do this, the cassettes are clipped out of the holder and the filament is fed from the roll to the MMU3. Threading the filament into the MMU3 requires some dexterity and is easier if we temporarily remove the feed tube behind the MMU to make it easier to thread the filament. As soon as the system has successfully loaded the filament, you can either test all five feeders via the menus or operate them directly on the MMU using three buttons.
First print results
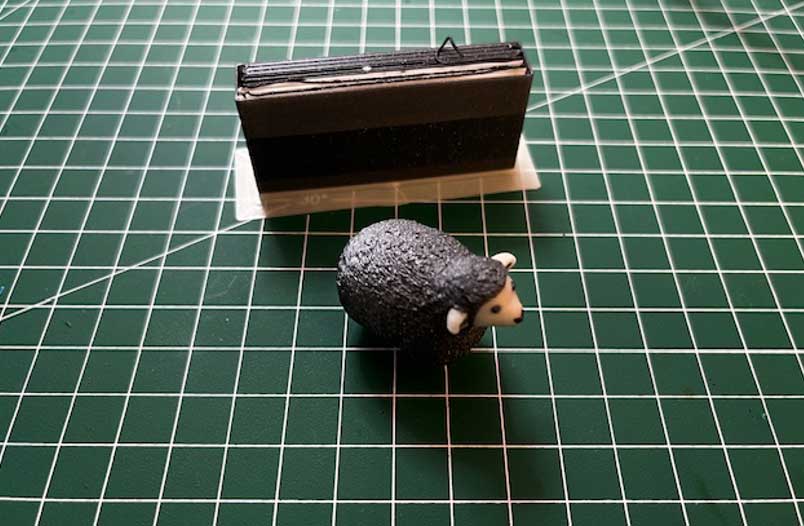
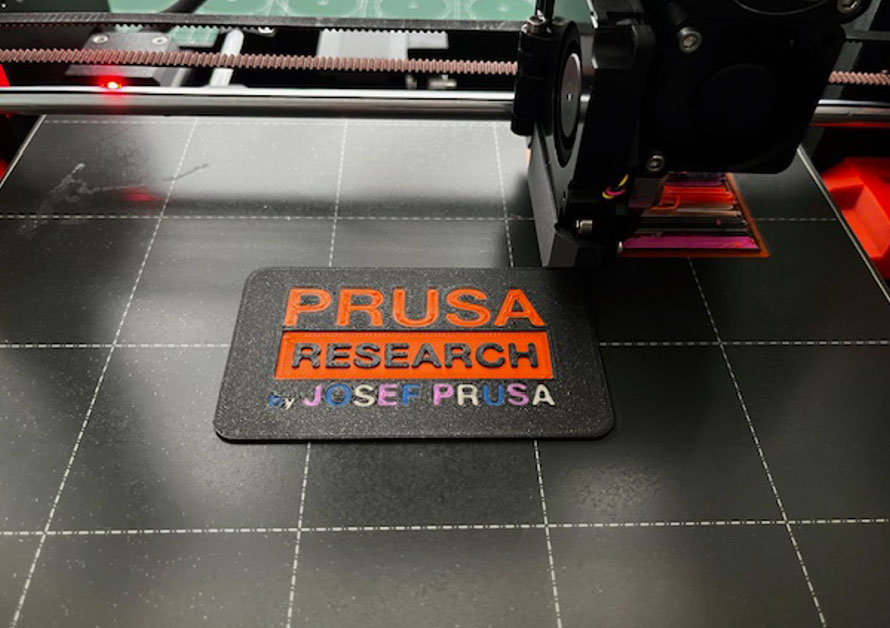
The device is now ready for use on the workbench and we can load the proposed sheep model and print it in two colors. The spools for all five colors and the material (in our case PLA) can be selected individually for each print using the menus. We start the print and wait eagerly until the extruder and the print bed have heated up, and the printer starts working diligently. Two and a half hours later, a two-color sheep stands on our print bed in front of a filament wall (which is necessary for a clean filament change) without any incidents.
We are delighted, not only with the problem-free printing and the usual print quality, but also because the Prusa can change the filament between the layers much faster, more gently and more cleanly than its Asian competitors. With the latter, a huge amount of filament is ejected from the side with each change, which not only multiplies the material consumption compared to the print volume, but also takes considerably more time.
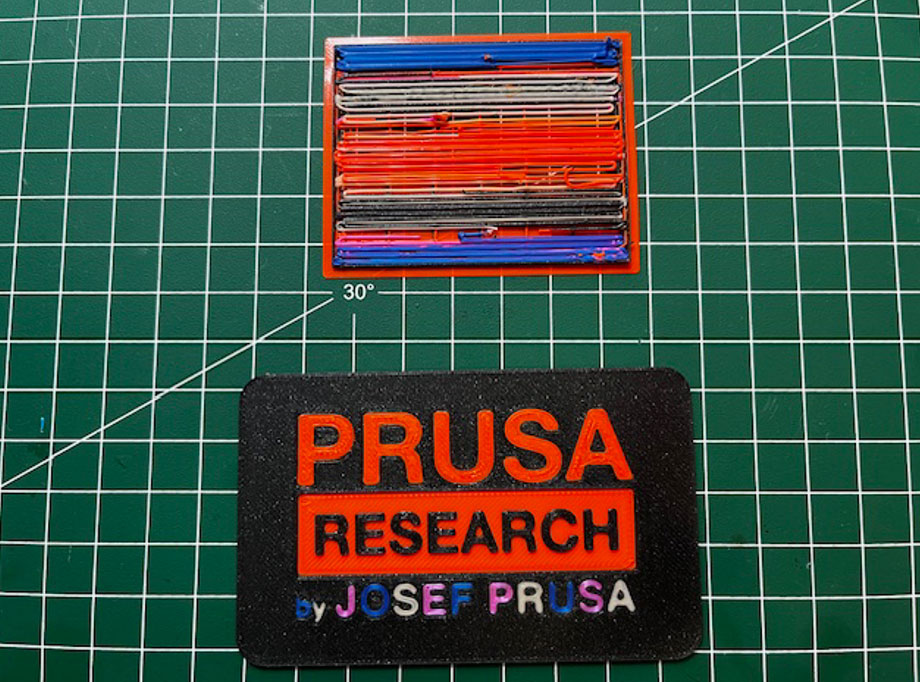
Multi-material test
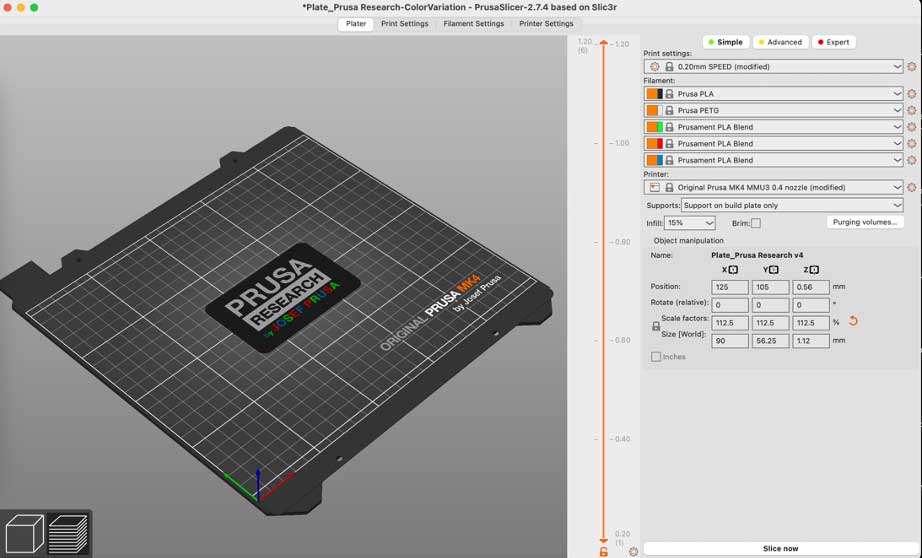
Next, we would like to test a model with five colors and meanly mix in a PETG spool between the PLA spools to test the multi-material print. It is important to ensure that the correct material specification is used, including the different nozzle temperature, as otherwise adhesion cannot be guaranteed. These settings can be made either before slicing or directly on the device. Here too, the printer does an excellent job and produces our first multi-material print with five coils in just 30 minutes.
Preliminary conclusion
Prusa Research remains true to its line and with the introduction of the Multimaterial Upgrade 3 (MMU3) addresses the criticisms of its predecessor, the MMU2, and sets new standards in multimaterial printing technology. The MMU3 promises significantly improved reliability and usability. The functional revision of the MMU3 is comprehensive. Particularly noticeable are the new, removable cassettes in the filament path, which considerably simplify the loading and unloading of the filament. This innovation significantly reduces the frequency of filament jams and improves the overall handling of the device. These optimizations have a direct impact on printing efficiency, which is confirmed in practice by test prints. However, we will have to wait until the coming months to confirm the long-term reliability and stability.
Disadvantages
- One point of criticism could be the space required for the multi-material setup – a challenge that also exists with competitor products.
- The comparatively higher price could be a deterrent for hobby users or smaller companies. However, this is quickly offset by the possibility of carrying out your own repairs and extensions. The investment is worthwhile for those who have already invested in the Prusa ecosystem and want to expand their multi-material printing capabilities.
- The setup time required might be a deterrent for some, especially if you can’t wait to print with multiple materials.
- Our biggest criticism was that the pack of gummy bears was too small for the set-up time. 😊
Advantages
However, the disadvantages mentioned are offset by numerous advantages:
- Reliability: the MMU3 is a big step forward in terms of filament transport stability and reliably adds a multi-material printing option to Prusa devices.
- Ease of use: The new cassettes and improved filament path make handling much easier.
- Upgradeability: The ability to upgrade from MMU2 to MMU3 is not only cost-efficient, but also sustainable.
- Material diversity: Compared to competitors, the system offers the option of printing with up to five materials.
- Efficient filament change: The filament change is significantly faster and gentler on the material than with competitor devices.
Prusa Research has managed to turn the feedback from the community into a convincing product that not only impresses with its functionality, but also with its user-friendliness.
The tested original Prusa MMU3 upgrade kit (for MK3.9/4) is available as presented here for 369€. If you print the parts yourself, the cost is reduced to 329€, with 2x 400g coils already included.
Subscribe to our Newsletter
3DPresso is a weekly newsletter that links to the most exciting global stories from the 3D printing and additive manufacturing industry.